Showing posts with label Dinner. Show all posts

Friday, June 21, 2013

Baked Macaroni & Cheese


Sometimes you just need a little comfort food, even if it is 90 degrees in June.  Macaroni cheese was the perfect thing to fit the craving when my sister and her husband came up for dinner last week.  This recipe comes from The Picky Palate Cookbook. While the cookbook is sort-of geared towards meals you can make for children, I found it to be pretty delicious, without being too decadent as some mac & cheese recipes are.  I made it with unsweetened almond milk, which dramatically reduced the calories and fat.  Using almond milk still created a cheesy and creamy macaroni and cheese and the panko coated top added a nice crunch.  I will definitely keep this recipe in my go-to recipe files.  It's quick, easy, tasty and man approved - what else could you want from a recipe?  

Baked Macaroni & Cheese
Serves 4 (main course servings)

1/2 lb. elbow macaroni
6 Tbs butter, divided
3 Tbs. flour
3/4 tsp kosher salt
1/2 tsp paprika
1/4 tsp ground pepper
1 1/2 cups milk
2 cups shredded cheddar cheese
1/2 cup panko bread crumbs

Preheat oven to 350 degrees.  Spray a 2 qt. baking dish with cooking spray

Cook the pasta according to package directions, drain and rinse under cold water.

Melt 3 Tbs. of butter in a large saucepan over medium heat. Add the flour, salt, paprika and pepper.  Stir to combine all ingredients, until it's almost like a paste.

 
 Slowly whisk in the milk and stir until mixture is smooth and thickened, about 5 minutes.


Stir in the cheese.
 
 
Once smooth, add in the cooled macaroni. 


Pour macaroni mixture into the prepared pan. To prepare the topping, melt remaining 3 Tbs. butter in a small dish in the microwave. Once melted, add the bread crumbs and toss to combine. Sprinkle panko over macaroni and bake for 25 minutes. Remove from the oven and allow to cool for about 10 minutes, if you can wait! Enjoy!


xoxo Melissa

Monday, May 13, 2013

Homemade Sloppy Joes


When I think of sloppy joes, I think of golf.  Golf?!? you might ask?  Yes, golf.  When I was growing up my mom would often make sloppy joes for dinner on Sunday.  Of course, to my dad who is a huge golf fan, Sunday at dinner time meant the finale of that weekends golf tournament.  My mom, dad, sister and I would often spend Sunday dinner seated around the TV watching the end of the weekends golf tournament.  For some reason, although my mom is a good cook and made many different things for Sunday supper, sloppy joes just tend to stick out.  It's been many years since I've bought that iconic can of Manwich, but I've found many recipes for homemade manwich, which have been just as good, if not better!  This recipe might take a little longer to make than by using the can, but I don't mind.  This one is adapted from The Pioneer Woman and since I enjoy her so much, it has become one of my favorites and one I make most frequently.

Sloppy Joes
Makes: 5 Servings

1 Tbs Olive Oil
1 1/4 lb ground chicken
1/2 yellow onion, diced
1 green pepper, diced
5 cloves garlic, minced
3/4 cup ketchup
1/2 cup water
1 Tbs brown sugar
1 tsp chili powder
1/2 tsp mustard powder
1/4 tsp red pepper flakes
2 Tbs tomato paste
1 tsp Worcester sauce
1 tsp Hot sauce
salt, to taste
fresh ground pepper, to taste
5 hamburger buns

Pour olive oil a large skillet or dutch oven over medium-high heat.  Add ground chicken and cook, breaking apart, until it's no longer pink. Add the onion, green pepper and garlic. Saute until vegetables get soft, about 5 minutes.


Add the ketchup, water, brown sugar, chili powder, mustard powder and red pepper flakes. Stir to incorporate throughout chicken and veggie mixture.  Let simmer for 15 minutes.  Then add the tomato paste, worcester sauce and hot sauce.  Taste it and add salt and pepper as needed.  Put a good heaping on each hamburger bun and it's as easy as that!

 
xoxo Melissa

Wednesday, April 24, 2013

BBQ Chicken Pizza


As many of you probably know, I love pizza. I could probably eat it several nights a week.  While there are a lot of great pizza places in the area, I love to make my own because I can put on whatever toppings I want and I can make it healthier, if I so choose.  Here's my take on CPK's BBQ chicken pizza.

BBQ Chicken Pizza
Makes: 1 large pizza

Pizza Dough
BBQ Sauce
1/2 cup Gouda cheese, shredded
3/4 cup Sharp Cheddar Cheese, Shredded
3/4 cup chicken (I used left-over chicken)
1/4 cup red onion, sliced thinly


Pre heat your oven to 425 degrees.  Roll out your pizza dough and place in on a pizza pan lightly sprayed with cooking spray.  Bake for about 10 minutes.  I keep an eye on my pizza dough while it bakes in case I see any air bubbles form.  If this happens, just take a fork and prick them so they deflate.

While the crust is baking, get all of your pizza toppings ready - shred cheeses and dice the chicken and onion.
 
Once the crust comes out of the onion spread a thin layer of BBQ sauce over the crust.  Be sure not to add too much or the crust will get soggy.  You can always drizzle extra BBQ sauce on top once it's finished baking. Then add the Gouda cheese, chicken, onion and top with the cheddar cheese.  Put the pizza back in the oven for another 10 minutes or so, until cheese us bubbly and starting to brown. 


Voila! Pizza is finished!  I like to let the pizza rest for about 5 minutes before slicing. If you try to slice it right away when it's too hot, it's been my experience that it doesn't slice very well and the toppings tend to get caught up in the pizza cutter.  Enjoy!

xoxo Melissa

Saturday, April 13, 2013

Christie's Lemon Roasted Chicken


After relaying my awful engagement chicken story to my friend, Christie, she kindly passed along a chicken recipe, which she had success making.  I nailed this one on my first try - woo hoo!  Thank you Christie, you saved my reputation with my husband for being able to cook a whole chicken!

Christie's Lemon Roasted Chicken
Serves: 4

1 (4-5 lb.) Roasting Chicken
1 small Orange, quartered
1 small Lemon, quartered
1 small Onion, peeled, quartered
2 Bay Leaves
Salt and freshly ground black pepper
2 Tbs. extra virgin olive oil

Preheat oven to 425 degrees. Remove any giblets from the inside the chicken.  This is definitely my least favorite part of the recipe, but you can do it!  Just count to three, stick your hand in, pull out all the unwanted parts and throw them in the trash! Make sure you have the trash can near-by.  Once that's over with (phew!) stuff the cavity of the bird with the orange, lemon, onion, and bay leaves.  If not everything fits, stuff as much in as you can, it will wilt while cooking.


If you have cooking twine, tie the legs together.  I didn't happen to have any on hand, so I left this step out.  The twine definitely makes it look a little prettier and supposed to help it cook more evenly. Salt and pepper the outside of the chicken, then transfer it to a roasting pan and drizzle with the olive oil.  Roast until a thermometer inserted into the chicken thigh registers 180 degrees and the juices run clear, about 70-90 minutes.

Check on the chicken about every 15 minutes while cooking and baste it with any juices.  If it starts to get too brown while in the oven, tent it with foil.

Once your chicken reaches 180 degrees, take it out of the oven, cover with foil and let rest for about 5-10 minutes.  This will help the juices redistribute throughout the chicken.  The 4-lb chicken I used, took 70 minutes in the oven.  I have also made this recipe with a 4.25 lb chicken and it took about 85 minutes in the oven.  The chicken is now ready to eat! Enjoy! 


xoxo Melissa


Wednesday, February 27, 2013

Spinach & Red Pepper Quesadilla


When I was a junior in college, I had a group of male neighbors who had a quesadilla maker, which I found to be hilarious. I mean, how hard is it to make a quesadilla in a frying pan?  For Christmas that year, as a joke, my mom got me the very same quesadilla maker. However, I've found it's actually a fun cooking appliance to have, even though it doesn't always get used when I make quesadillas.  It has spurred me to come up with more creative quesadilla recipes though.  This one is more of a Greek quesadilla.  I encourage you to come up with your own fun non-traditional quesadilla recipes too!

Spinach & Red Pepper Quesadilla
Serves: 2

4 medium, Whole Wheat Tortillas
1/2 cup frozen chopped Spinach, thawed and drained
1/2 cup Roasted Red Pepper, diced
3/4 cup shredded Mozzarella Cheese
2 Tbs Feta Cheese
 
 
Place a large, shallow frying pan over medium heat. Let it pre-heat for about 2 minutes while you assemble your quesadilla. To start, lay two flour tortillas each on their own large plate. Start to layer on the ingredients. I put about half of the cheese down first, then the spinach, red pepper, feta and end with the rest of the mozzarella. I like to start and end with the mozzarella cheese so the tortillas have something to stick to.
 
 
Top with the other tortilla half. And place in the pre-heated pan.

 
Let it cook for about 2 minutes and then once the bottom is browned flip to the other side. I first press down on the top a bit to help it all stick together and then use a spatula to help me flip it over. Let the second side cook for about another 2 minutes. Repeat with second set of tortillas.


Flip the finished quesadilla onto a plate once both sides are browned.  Let it cool for a minute or two.


Cut it into pieces and you're done! It was that easy!

xoxo Melissa

Thursday, March 29, 2012

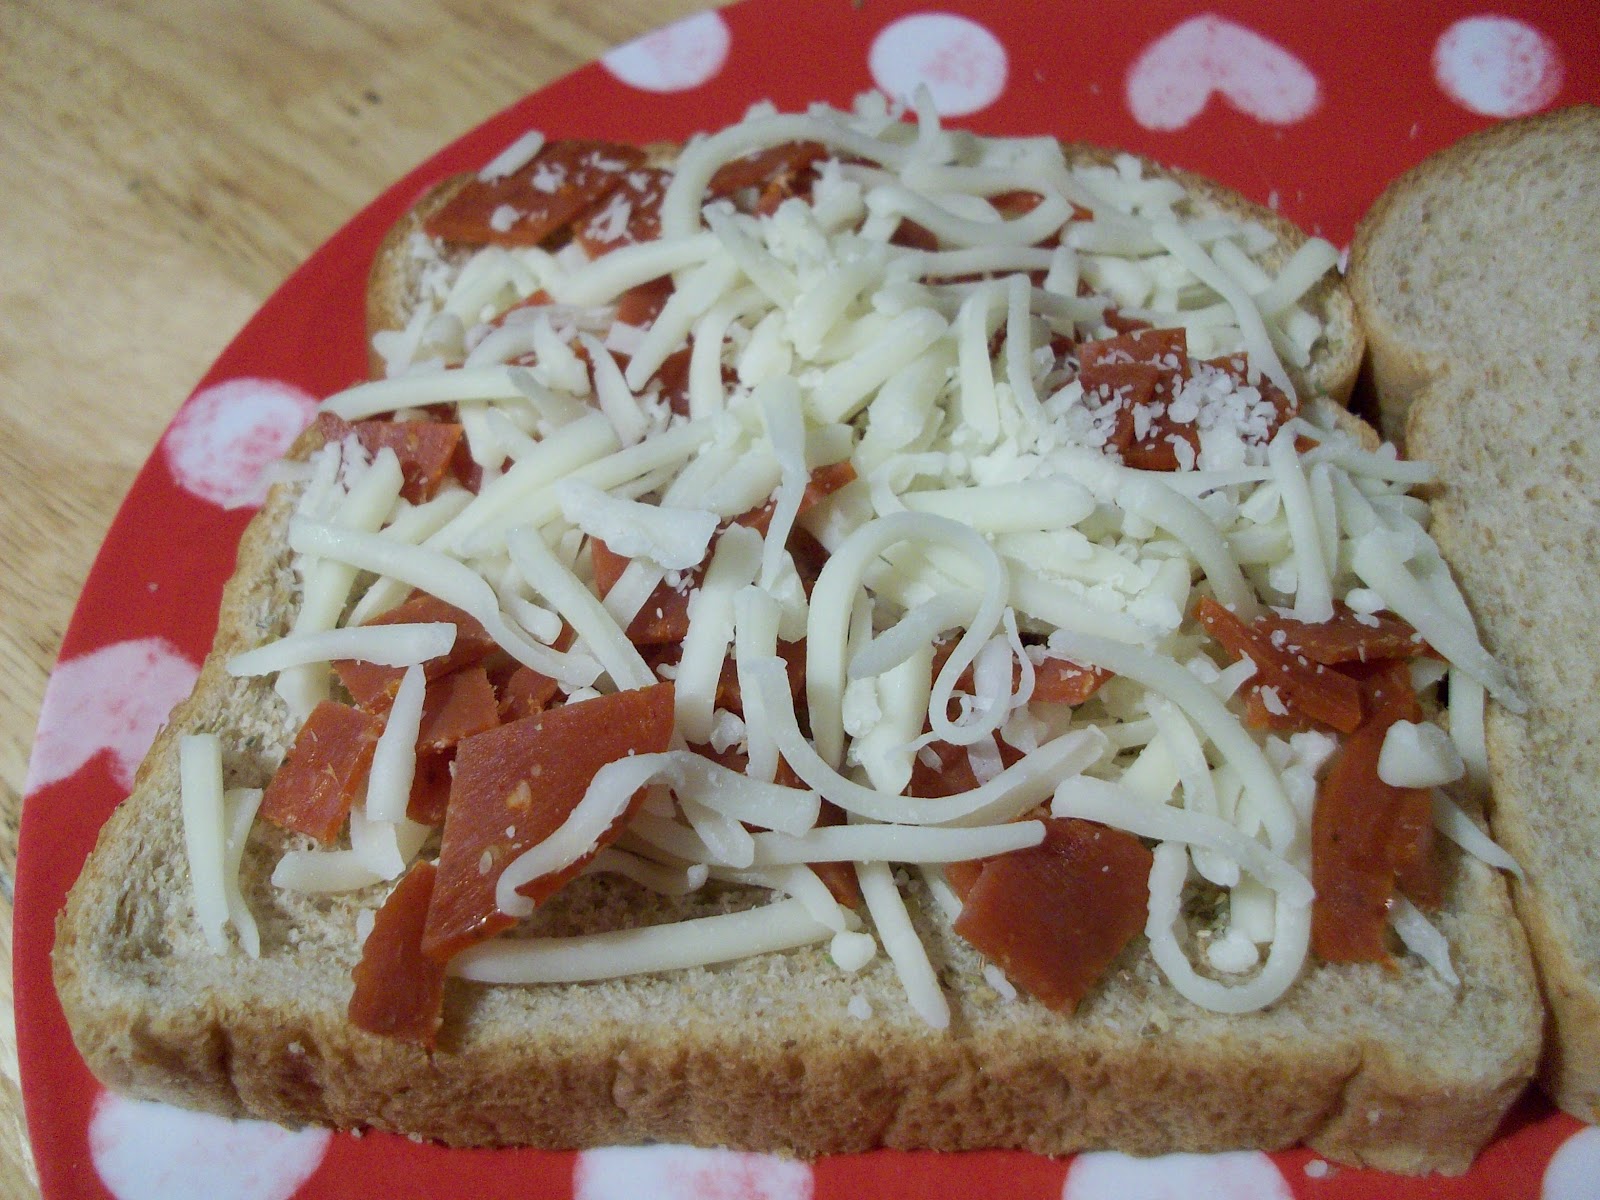
Pizza Grilled Cheese


Have you ever had a food craving where you know it wasn't going to subside until you ate whatever it was?  I tend to get those a lot.  Just the other day I was in the mood for a grilled cheese sandwich when I remembered we were all out cheese singles - what was a girl to do when a craving hits! After remembering the left over ingredients from making pizza the other night, I thought "what about pizza in the form of grilled cheese?   Could it be done?"

The answers is "Yes!"  I'm here to show you how to do it:

Pizza Grilled Cheese
Serves: 2

4 slices of Bread
1/2 cup Shredded Mozzarella Cheese
1/4 cup Turkey Pepperoni, chopped
dash Italian Seasoning
1/4 cup Pizza Sauce
*sliced Black Olives, optional


Butter one side of each bread slice. With the buttered side laying on the plate, sprinkled on some mozzarella, a dash of Italian seasoning, the chopped pepperoni and then the rest of the cheese.
Putting cheese on the bottom and the top will help make the contents stick to both pieces of the bread.

*Side Note: I happened to have some left over black olives in the refrigerator, so I added a few to my sandwich.  Feel free to add any of your favorite pizza toppings too!


Top with the other slice of bread, buttered side facing up.  Pre-heat a sauce pan, over medium heat, for about 2 minutes. Since I used a non-stick pan and the bread was buttered, I didn't spray the pan with cooking spray.  Place sandwiches in pan, cook for 5-6 minutes total.  I cooked the first side for three minutes, flipped and cooked for two more and then flipped back to the original side for one more minute.


Serve with a side of warmed pizza sauce.


Enjoy!

P.S. Hubby asked for a second sandwich after finishing his first, so make sure you have extra ingredients on hand!

xoxo Melissa

Friday, March 23, 2012

Mediterranean Pizza


While my husband and I are generally healthy eaters, we both really enjoy pizza.  We occasionally splurge and order it, but I'm a big fan of making it myself.   This allows me to make it healthier, add whatever toppings I want and it's much cheaper.   I usually make the pizza dough recipe from my Martha Stewart Everyday Cooking cookbook, however I found this whole wheat pizza recipe on her website recently and thought I'd give it a go. 

When I lived in Massachusetts, there was a pizza place near me called Three Aces.  They made the BEST Mediterranean pizza and I've been hooked ever since.  I don't know if I'd call this "healthy" or not... but I like to think it's on the healthier side as far as pizza goes.

Mediterranean Pizza
Serves 2-4

1/2 recipe of Martha's whole what pizza dough, link above.
2 Garlic Cloves, minced
8 oz. Pizza Sauce
1 tsp Leaf Oregano
1 (10 oz) Box Frozen Spinach, thawed
1/2 (14.5 oz) can Artichoke Hearts, drained and diced
1 (2.35 oz) can sliced Black Olives, drained
1/4 cup sliced Banana Peppers
1 cup shredded Mozzarella Cheese
1/3 cup Feta Cheese


Make pizza dough per Martha's directions.  When making pizza dough, I generally freeze half of the recipe for later use.  I used 1/2 of Martha's recipe.  Pre-heat oven to 450 degrees. Sprinkle a little cornmeal on a kitchen counter.  Roll out dough to the desired shape.  Place dough on a 15-inch pizza pan sprayed with cooking spray.  I usually let mine sit for about 10 minutes if it doesn't quite fit the pan and then try to stretch it out a little further, right on the pan.  With a fork, make prick marks all over the dough to prevent any air pockets from bubbling up.  Bake pizza shell for about 10 minutes.  Check on it every few minutes to make sure no air pockets are forming.  Take dough out of the oven. Sprinkle minced garlic over crust. Spread sauce over dough & garlic and then sprinkle with oregano


Layer on ingredients: spinach*, artichoke hearts, black olives, banana peppers, mozzarella and feta cheeses.

* Once spinach is thawed, take small handfuls over the sink and squeeze out the water.  You don't want your pizza to get mushy from excess water


Bake for another 10 or so minutes, until cheese is melted and slightly browned.  Try to let it cool for 5 minutes, if you can!  I love that first bite, with all of the veggies, salty cheese, sweet sauce and crisp whole wheat crust.  I could probably eat this whole pizza if I wanted  to - Enjoy!


This is what the pan looked like when we were done... clearly this was a 2-serving pizza night!


Wednesday, March 21, 2012

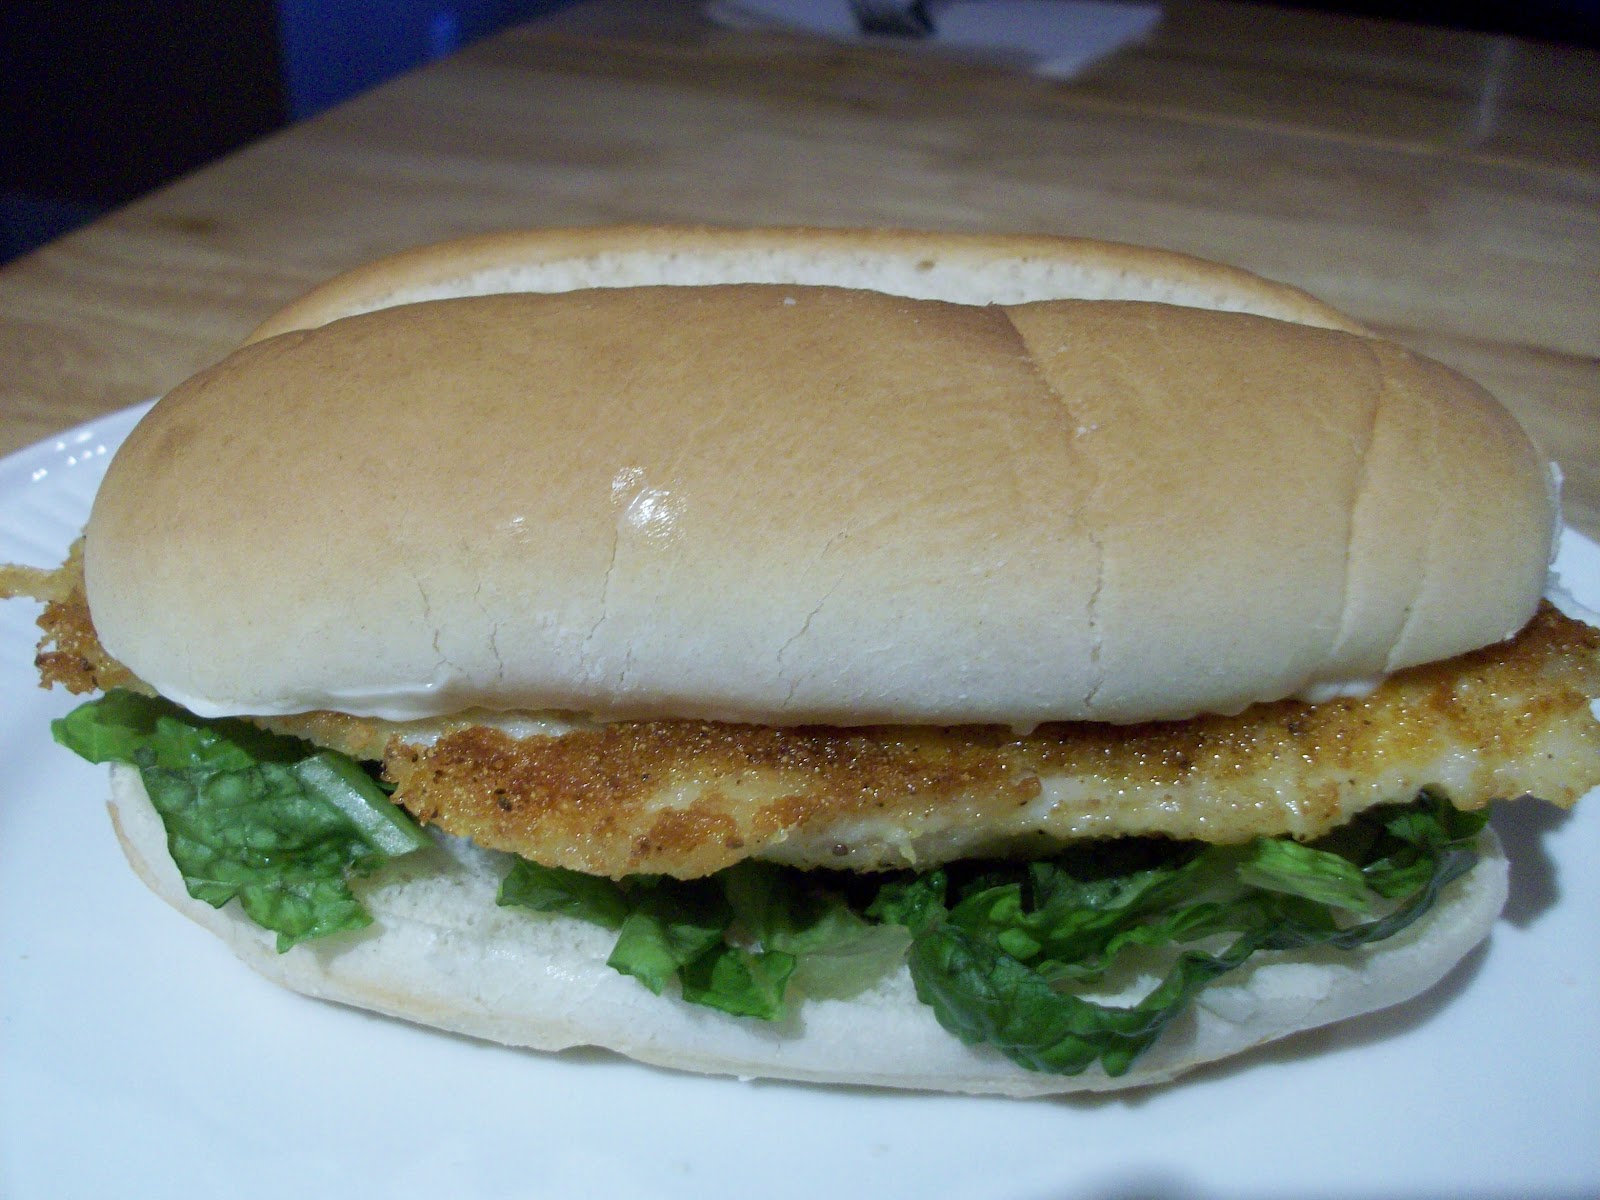
Cornmeal-Crusted Catfish Sandwich


With Lent upon us, I've been working on some different fish dishes to serve on Fridays.  My husband will often make cornmeal-crusted catfish or tilapia, which is really good!  In an effort to change things up a bit, I've decided to turn it into a sandwich.  I love a good fried fish sandwich and while those on restaurant menu's call my name, my arteries and overall health say "no!"  This is my slightly healthier take on a fried fish sandwich. 


Cornmeal-Crusted Catfish Sandwich
Serves: 2

2 Catfish filets
2 tsp Cornmeal
1 tsp Old Bay Seasoning
Pepper

1-2 Tbs Extra Virgin Olive Oil for skillet

2 Hoagie Buns
Light Mayo
Shredded lettuce


Lay fish filets on a plate.  Sprinkle on cornmeal, Old Bay seasoning and fresh ground pepper.  Use 1/2 tsp of cornmeal, 1/4 tsp Old Bay and 1-2 grinds of fresh pepper, per side.  Flip filets over and repeat. 


Heat 1-2 Tbs oil in a sauce-pan, over medium heat. You want enough oil to easily cover the bottom of the pan.  Once the pan has heated for a minute or two, add the filets.  Cook for 10-12 minutes total, flipping once.  The cooking time will depend on how big and thick your fish is. 

 
While fish is cooking, take out a cookie sheet.  Lay a paper towel on top of the cookie sheet and put a cooling rack on top.  After the fish is done cooking, you will let them sit here for a minute or two. This step can be optional, but it helps drain any extra oil before putting it on your sandwich.  Plus it gives you time to get your sandwich ready.


Once the filets are done cooking, move them to the cooling rack for a minute or two. 


While the fish is cooling, prepare your sandwich.  On one half of the hoagie bun, spread as much mayo as you'd like.  Top other half of hoagie bun with the shredded lettuce. 


Lay fish on top of lettuce. Top with the other half of the bun. Try not to inhale it all at once!  The salty and slightly crunchy fish filet, combined with the tangy mayo and fresh, crisp lettuce!  Delish!  I hope you enjoy this "healthier" version of a restaurant style fish sandwich as much as I did!


xoxo Melissa